Blog
How to Master Paint by Numbers Instructions: A Beginner's Guide

"I can't even draw a straight line!" Sound familiar?
Here's the good news: paint by numbers instructions have helped millions of self-proclaimed "non-artists" become confident painters. This step-by-step painting system makes complex artwork manageable by breaking it into simple, numbered sections anyone can complete.
We tested numerous paint by numbers techniques and collected tips from beginners and experienced artists. You'll find answers whether you want to know how paint by numbers works or need the best methods to complete your artwork. This complete guide takes you through everything from simple setup to advanced techniques.
Ready to transform those numbered spaces into a masterpiece? Let's begin your creative experience!
Understanding Paint by Numbers Fundamentals
The sort of thing I love about paint by numbers is how it opens up a whole new world of creativity! Let's explore this amazing system that turns complex artwork into bite-sized pieces anyone can handle.
How Paint by Numbers Systems Work
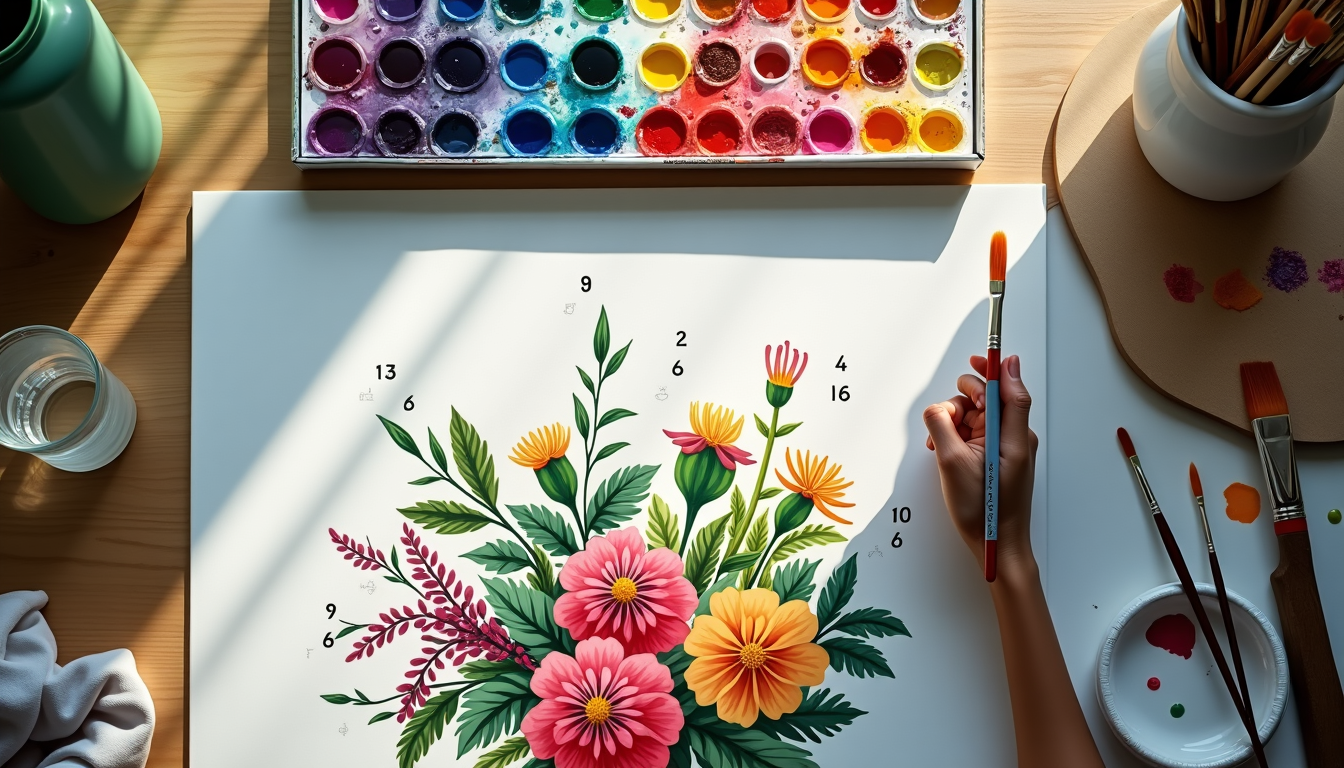
Paint by numbers combines brilliant simplicity with amazing results. The system breaks down pictures into distinct shapes, and each shape gets a number matching a specific paint color. Picture it as a roadmap where numbers guide your brush toward creating beautiful artwork. The best part? You don't need natural artistic talent – a love for art and a somewhat steady hand will get you there.
Reading and Interpreting Number Codes
A paint by numbers canvas shows various numbered sections. Here's what they mean:
- Single Numbers: Each links to one paint color
- Double Numbers (like 1/8 or 3/5): These need equal parts of two colors mixed
- Blank Areas: These match unnumbered paint pots
- Gray Dots: These need gray paint
Essential Materials and Tools Checklist
The right materials make a huge difference in your painting journey. Here's what you'll want nearby:
- Canvas Elements:
- Pre-treated artist-grade linen canvas
- Reference photo of the finished painting
- Digital copy to zoom into details
- Paint Supplies:
- Creamy acrylic paints (pre-mixed and numbered)
- Two water cups (one to clean, one to mix)
- Paper towels to clean brushes
- Brushes and Tools:
- Set of quality brushes in various sizes
- Fine-tip brush to handle details
- Larger brush for bigger areas
Good lighting and a flat, stable surface are significant factors in your success. Note that acrylic paints dry quickly, so keep those paint pots tightly closed when not in use. These basics and the right tools set you up for an amazing painting experience.
Setting Up Your Workspace for Success
A well-designed workspace plays a vital role in your paint by numbers experience. You need to create an environment that promotes both creativity and efficiency after gathering all materials.
Optimal Lighting and Surface Requirements
The right lighting makes the most important difference in painting accuracy. Natural light works best, particularly from north-facing windows that provide steady illumination throughout the day. Artificial lighting with these specifications helps when natural light isn't available:
- Color temperature of 5500-6000K for daylight simulation
- High Color Rendering Index (CRI) of 90+ for accurate color perception
- Adjustable task lighting to prevent shadows
- Positioning lights at 35° angle to minimize glare
Your painting surface should be flat and stable with easy cleanup options. We recommend covering the workspace with a protective sheet to catch paint drips and simplify cleanup.
Organizing Your Paint Colors and Tools
Good organization helps maintain flow while painting. A simple system keeps everything within reach. Arrange paints by color family, from light to dark shades. This helps you find specific colors quickly without checking the chart repeatedly.
Create designated zones for:
- Active paint pots (those currently in use)
- Clean water cups and paper towels
- Brush selection and cleaning area
- Reference materials and charts
Creating an Ergonomic Painting Station
Comfort plays a vital role during long painting sessions, as we've learned over the last several years of paint by numbers instructions. Position your canvas at eye level to maintain proper posture whether sitting or standing.
An adjustable chair supporting your back while keeping feet flat on the floor works best for seated work. The ideal distance between us and the canvas should be about an arm's length. An adjustable easel helps when standing, and taking breaks every 30-60 minutes keeps you fresh.
Support your painting arm on a table or use a mahl stick for stability. This reduces fatigue during detailed work and helps maintain steady hand movements while following paint by numbers instructions.
Canvas Preparation Techniques
The right canvas preparation can make or break your paint by numbers experience. We found that there was a few game-changing techniques that will help you get professional results.
Flattening and Mounting Methods
A fresh canvas usually springs back to its rolled position when you first open it. Here's our tested process to get a perfectly flat surface:
- Reverse roll the canvas (printed side out) for 2-3 minutes
- Place under heavy, flat objects like books
- Focus weight on corners to prevent stubborn curling
- Allow 24 hours to flatten completely
Mounting the canvas on foam board creates a stable painting surface that works great. This method offers portability and keeps the canvas steady during detailed work.
Using Gesso and Primers Effectively
Clear gesso is our secret weapon to improve paint application. Your paint by numbers canvas comes pre-primed, but adding clear gesso brings several benefits:
- Creates better paint adhesion
- Reduces the number of coating layers needed
- Provides smoother coverage
- Prevents paint from seeping through canvas weave
Apply clear gesso (never white, as it covers numbers) with gentle brush strokes in alternating directions. Important tip: Let it dry for 24 hours before you start painting. This extra time gives you superior results.
Digital Tools for Number Mapping
Digital tools are a great way to get more from your paint by numbers experience. These tools changed how we track progress and handle complex patterns. Apps like PBNify or Color Dragon help you:
Create digital maps of painting sections to track progress easily. You can mark finished areas and plan your painting strategy better. Some tools even create printable PDFs with color-coding systems.
Digital zooming features help with detailed sections. This feature is perfect when you work with smaller spaces or areas where numbers might be hard to see.
Pro tip: Take a high-resolution photo of your canvas before you begin. This gives you a backup reference if paint covers any numbers.
Mastering Basic Painting Techniques
Paint by numbers becomes an art form when you master simple techniques. Success comes from understanding three key aspects: brush control, paint consistency, and stroke patterns. Let's look at these skills that will lift your painting experience.
Proper Brush Selection and Handling
You need the right tool for each task to master brush control. Holding your brush like a pencil helps create gentle, precise strokes that will substantially improve your painting. Here's a proven approach to brush handling:
- Start with clean, properly moistened brushes
- Tap excess paint on the pot's rim to prevent blobs
- Hold the brush at a 35-degree angle to control better
- Apply gentle pressure for thin lines
- Increase pressure gradually for broader strokes
Pro tip: Keep a small sponge beside your paint pots to rest brushes during breaks. This prevents paint from drying on the bristles and keeps your brushes in good shape.
Paint Consistency Management
The right paint consistency is a vital part of achieving professional results. Acrylic paint can be temperamental, but proper management helps maintain perfect consistency throughout your painting session.
To get optimal paint consistency:
- Start with a small amount of paint and add more as needed
- Add 2-3 drops of water when paint begins to thicken
- Keep a spray bottle handy to adjust moisture quickly
- Test consistency on a spare surface before applying to canvas
- Mix colors confidently, starting with lighter shades
Note that: Paint application works best with less paint. You can always add another layer, but removing excess paint creates problems.
Stroke Patterns for Different Areas
Each section of your canvas needs a different stroke approach. Your technique should vary based on the area you're painting. Large sections need broad, even strokes in the same direction. Detailed areas work better with short, controlled movements.
A special technique works well for edges where colors meet: work on both bordering areas while the paint is wet. This creates smooth transitions between colors. Detailed sections need your smallest brush with minimal paint on the tip.
Important technique: Large areas look best when you pull paint from the outline toward the center. This ensures even coverage and stops paint from building up along edges. This method consistently gives professional-looking results in paint by numbers projects.
Perfect finish requires at least two layers of paint. The first layer creates basic coverage, and later layers add depth and richness to colors. Each layer should dry completely before adding the next for best results.
Color Application Strategies
Your success with paint by numbers depends on becoming skilled at color application. Our extensive experience shows that the right approach to applying colors can reshape the scene from a good painting to an exceptional one.
Working from Light to Dark Colors
Our experience with acrylics shows that starting with lighter shades lets you retain control over the final result. You can build depth gradually and maintain better coverage throughout your painting process. Light colors create an excellent foundation for darker shades to build upon, especially in areas where colors need to transition smoothly.
You can create watercolor-style effects by diluting lighter shades slightly to create a transparent base. This technique gives you the flexibility to adjust the intensity as you progress, and each section achieves the perfect shade.
Paint Coverage and Layering Tips
Strategic layering leads to professional-looking results. Here's our proven process for perfect coverage:
- Apply first coat thinly and evenly
- Allow complete drying between layers
- Add second coat in perpendicular direction
- Assess coverage and add third layer if needed
- Use white markers for stubborn numbers
Pro tip: Paint consistency plays a vital role in coverage. The paint works best when you add just 2-3 drops of water to maintain optimal flow while keeping color vibrancy.
Preventing Color Bleeding
Color bleeding can quickly reduce your artwork's quality, but we have developed strategies that maintain crisp, clean lines. Our most successful approach has:
- Controlled brush strokes near borders
- A slightly drier brush near edges
- Complete drying time for adjacent sections
- Subtle barriers between colors
- Optimal paint consistency
Patience becomes your greatest ally to prevent color bleeding. Taking time between sections allows colors to set properly and reduces unwanted mixing. Challenging areas benefit from our barrier technique: a thin, clear medium between colors acts as a protective shield.
Larger sections work best with our special technique of painting from the center outward. This approach helps you control paint flow better and reduces color bleeding into adjacent areas. Detailed sections that need precision require our smallest brush with minimal paint. Build up the color gradually instead of applying it heavily at once.
Note that vibrant, clean results need time and attention for each area to ensure proper coverage and clean edges. This methodical approach helps create stunning paint by numbers artwork that looks professionally executed.
Progress Tracking and Organization
Good organization during a paint by numbers project can make the difference between frustration and an enjoyable artistic trip. We found that proper tracking and organization not only lead to better results but also improve our creative process.
Creating a Painting Schedule
Time management became our secret weapon to complete paint by numbers projects successfully. We developed a simple approach that keeps us on track:
- Divide the canvas into manageable sections
- Estimate time needed for each section
- Set realistic daily or weekly painting goals
- Schedule regular painting sessions
- Allow buffer time for drying between sessions
Pro tip: Working in 30-60 minute sessions helps maintain focus and prevents fatigue. Regular breaks keep our creativity flowing and will give a consistent quality throughout the project.
Using Digital Progress Tracking Apps
Technology changed how we track our painting progress. Time Tracker by Zafer Ertas works great for artists. This app has several great features:
- User-friendly interface with three main tabs
- Session history tracking ranging from minutes to hours
- Activity-specific time monitoring
- Customizable icons for different projects
- Filtered views by day, week, month, and year
This app helps us understand our painting patterns better. Session tracking shows how our speed improves over time and lets us estimate completion times for future projects accurately.
Maintaining Paint Freshness
Paint storage is vital to maintain the quality of our work. We developed a quick way to organize materials during projects:
Active projects need paint pots stored in clear containers with proper labeling. This method helps us:
- Keep track of paint consistency
- Prevent premature drying
- Maintain color vibrancy
- Access colors quickly during painting sessions
Partially completed projects go into large clear ziplock bags to keep everything together. Each bag needs a label with the canvas name and includes:
- Reference photos
- Paint pots
- Work-in-progress notes
- Color charts
Long-term storage works best in a cool, dry environment. Paint stays fresh when we:
- Tightly seal paint containers after each use
- Add a few drops of water when paint thickens
- Use plastic wrap for extra protection
- Check regularly for signs of drying
Important reminder: We store works in progress separately from completed pieces and new kits. This system helps us focus on current projects while keeping future ones properly preserved.
Larger collections fit well in cube storage bins with fabric inserts to organize canvases. This method lets us:
- Sort projects by completion status
- Protect canvases from dust and damage
- Access specific projects easily
- Maintain proper storage conditions
Troubleshooting Common Issues
Paint by numbers can challenge even the most experienced artists, but we have developed solutions that work for every common issue. Let's explore these painting predicaments and tackle them with confidence and skill.
Fixing Paint Coverage Problems
Patchy coverage frustrates many artists, but several techniques help achieve smooth, professional results. The paint consistency needs assessment first. Too thick or too thin paint can both lead to coverage issues.
The best coverage comes from:
- Applying thin, even layers instead of one thick coat
- Using a slightly dampened brush that helps smooth application
- Working in small sections to keep coverage consistent
- Adding a second coat after the first one dries completely
A toothpick works great to apply paint in tiny spots where brush strokes might be too broad.
Dealing with Smudges and Mistakes
Everyone makes mistakes - painting the wrong color or creating unwanted smudges happens often. The good news? You can fix these errors easily. Our proven correction process has these steps:
- Let the mistake dry completely
- Apply a thin layer of the correct color
- Wait for it to dry
- Add additional layers if needed
- Blend edges with adjacent areas
Pro tip: A piece of paper placed as a guard near completed sections prevents accidental smudging. This simple technique saves hours of touch-up work.
Slightly drier paint near borders helps maintain crisp lines and prevents bleeding. The paint should dry completely before carefully applying correction layers if bleeding occurs.
Reviving Dried Paint
Finding dried paint in the middle of painting feels incredibly frustrating. The art of paint revival depends on knowing which solution matches different paint types.
Acrylic paints (most common in paint by numbers) need:
- 2-3 drops of warm water
- Really good stirring for 2-3 minutes
- Consistency testing on a spare surface
- More water if needed, one drop at a time
Keep in mind: Adding too much water dilutes the color intensity. Paint revival needs patience to work well.
Severely dried paint responds to this specialized technique:
- Add warm water drops
- Stir gently
- Let it sit overnight
- Mix again in the morning
- Test consistency before use
These habits prevent paint from drying:
- Paint pods need immediate closing after use
- Cool, dry places work best for storage
- A damp cloth near the workspace maintains humidity
- A spray bottle helps quick moisture adjustments
Paint separation shows as clear liquid on top - just stir it until the consistency returns to normal. Any unusual odors or mold mean the paint needs immediate replacement to maintain artwork quality.
Prevention works better than correction. An organized workspace with easy access to water and cleaning supplies helps maintain optimal paint consistency throughout painting sessions.
Quality Assessment and Improvement
Quality assessment is the final step in our paint by numbers experience. We've put in time and effort into our artwork, and now we need to make sure it's the best it can be before we call it done. Let's get into professional ways to evaluate and perfect our masterpiece.
Evaluating Your Work Objectively
Knowing how to look at our artwork objectively comes from experience. We found that there was an emotional connection to our work that can affect our judgment, so here are proven ways to evaluate:
- Original Assessment Steps
- Stand 6-8 feet away from the painting
- Look at it in different lights
- Check it from multiple angles
- Look at your reference photo
- Make sure paint coverage is even
Important insight: We've learned not to judge our work too early – paintings go through an "ugly duckling" phase. During evaluation, we switch to "critique mode" and look at specific details instead of making broad judgments.
For areas we've been working on up close, we take several steps back. This helps us see things with fresh eyes and spot places that need work. Note that if we can't find anything good about our work, it's time to take a break and come back later.
Using Photography for Progress Review
Photography has changed the way we look at our paint by numbers projects. Here's our tried-and-true method that helps us catch things we might miss:
- Take clear photos in natural light
- Keep camera angles the same for progress shots
- Check photos against your reference
- Save photos to track progress
- Look at photos on different screens
Pro technique: Looking at our work through a phone or tablet often shows us things we need to fix that we couldn't see before. This digital view helps us spot uneven colors and coverage.
When we check our photos, we look for:
- How colors blend together
- Overall balance
- Places where numbers show through
- Even paint application
- Clean edges
Making Final Touch-ups
The best paintings stand out because of careful finishing touches. We've gotten better at this over years of working with paint by numbers.
We start by looking at our work in different types of light. Natural light shows true colors, while artificial light helps us find missed spots. Our touch-up process is straightforward:
Surface Inspection:
- Look for covered numbers
- Check if similar colors match
- Look at edges between colors
- Find thin spots that need more paint
A protective coat improves and preserves our work. A clear acrylic sealer protects the painting and adds a nice shine that makes colors pop.
Expert tip: We always make sure touch-ups are dry before sealing. This way, we won't seal in any mistakes we can't fix later.
For final adjustments, we check:
- Smooth brush strokes
- Blended colors
- Added highlights
- Even paint thickness
- Clean edges
Good lighting makes a big difference at this stage. We position our work to see every detail:
- Natural light for true colors
- Angled lights to see surface issues
- Different distances for perspective
- Various room spots for different lighting
The last check involves looking at the painting from different spots and angles. We pay attention to how light hits different parts of the painting to make sure everything looks consistent.
We take final photos of our finished work. These help us remember what we've done and serve as references for future projects. Comparing our work with these photos helps us keep our quality consistent across all our paint by numbers projects.
Conclusion
Paint by numbers goes beyond a simple hobby and opens doors to artistic confidence and skill development. Many beginners have become accomplished painters after they learned proper workspace setup, careful canvas preparation, and simple techniques.
Beautiful finished pieces emerge from attention to detail and proven methods. The artist's proper color application, quality tracking, and regular assessment create artwork worthy of display.
Each painting builds artistic confidence and teaches valuable lessons. These instructions and techniques will help you create stunning artwork that shows your developing skills. Your artistic abilities will grow with every completed canvas when you start with smaller projects and practice patience with each numbered section.
